


SkyWatcher Star Adventurer Portable Setup Part 6
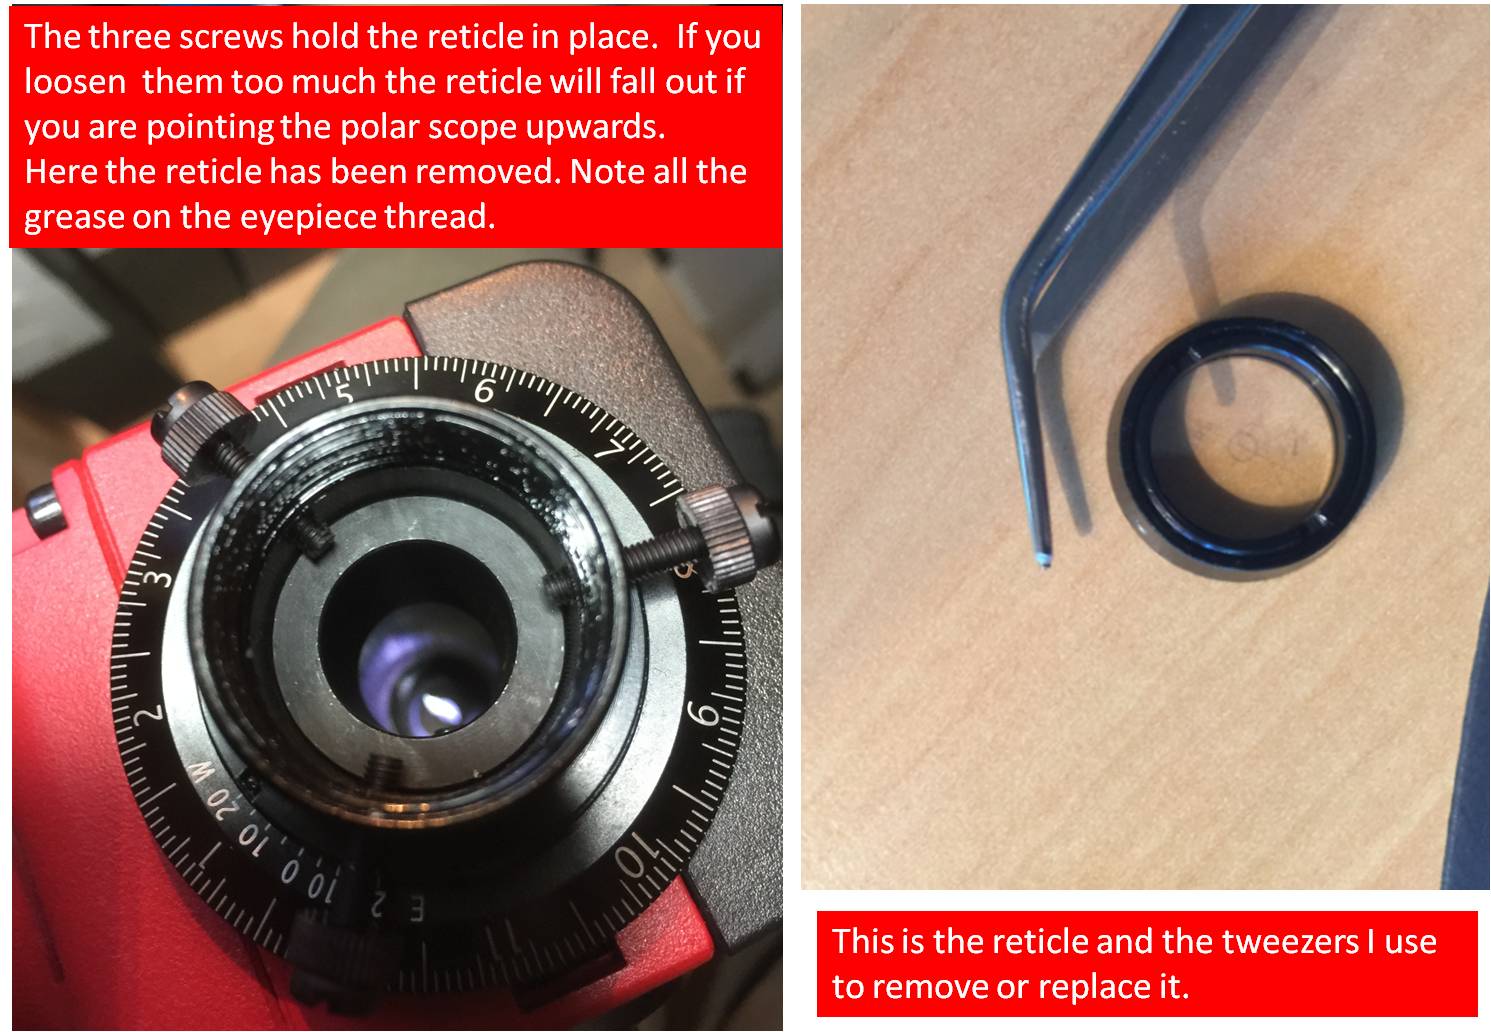
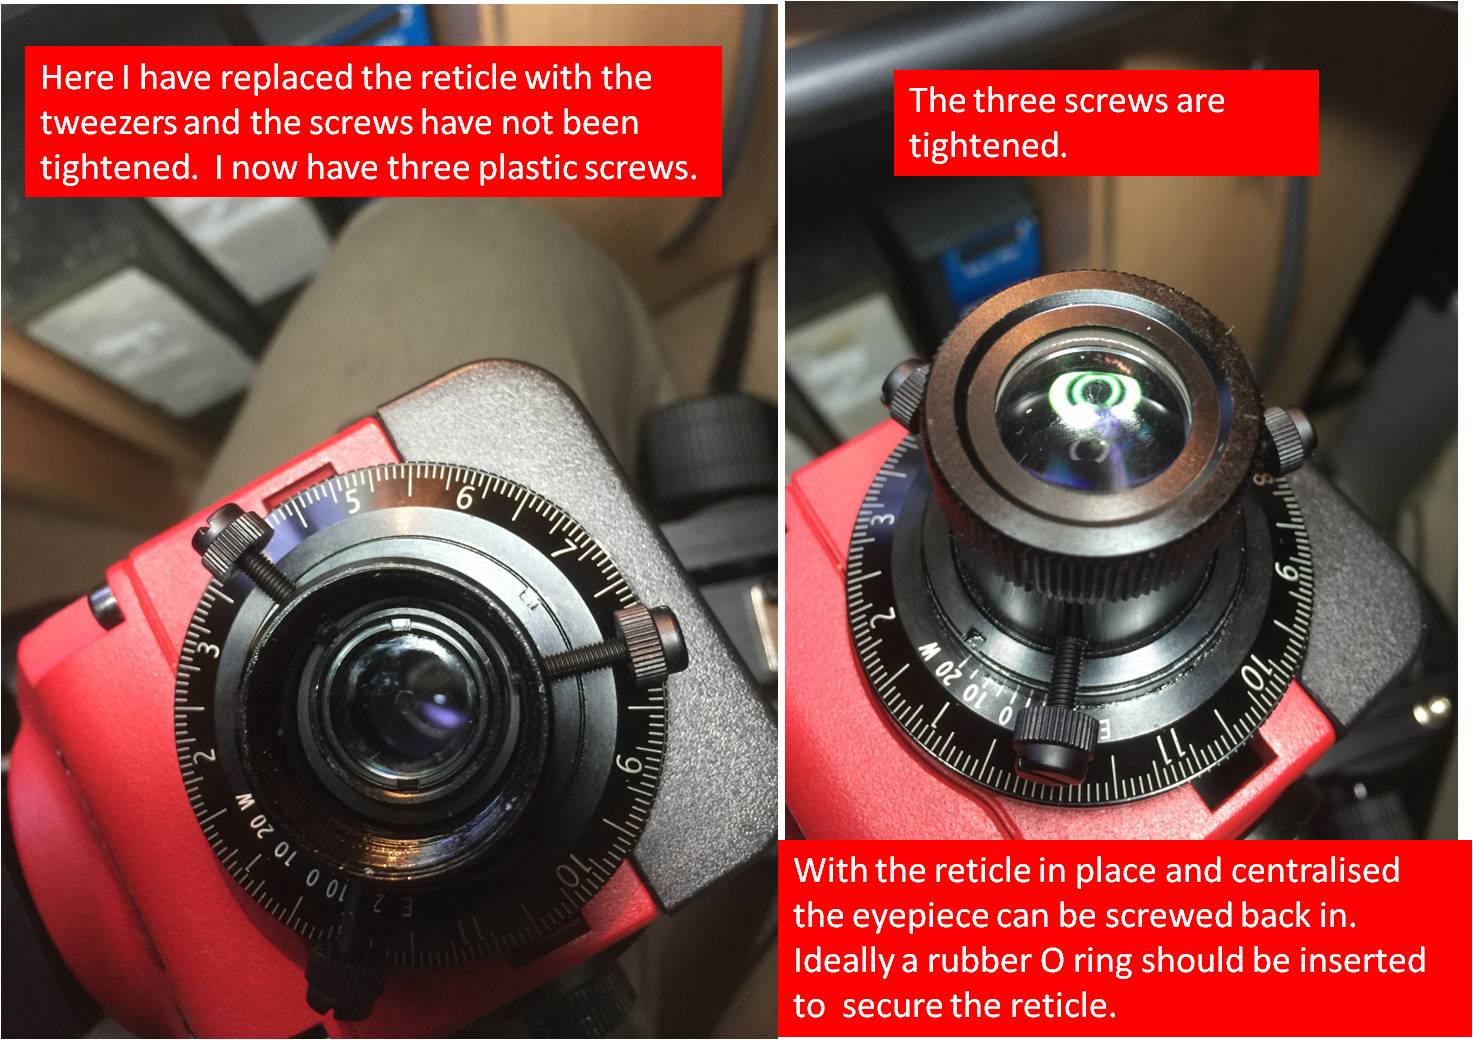
Before aligning the mount via Polaris at night it is essential to make sure that the axis of the polarscope is parallel to the polar axis itself. If it is not the cross at the centre of the polarscope reticle will perform a little (or large if it is really off) circle of its own as the polar axis is rotated. Aligning via Polaris will then be incorrect and you will get trailed stars. This is a daytime activity. I used a nearby tv aerial on a chimney to do this. I followed "astronomy shed's" guidance and replaced the grub screws on the star adventurer polarscope with thumb screws. This improved the ease of adjustment by about a million times - a huge difference - it is quite painful trying to adjust the reticle position with an Allen Key! I found that Meade thumb screws from some of my other equipment were a perfect fit. I believe it is an M3 thread if you do not have any of these. I will need to buy replacements anyway. I took out the grub screws one at a time and screwed in the thumb screw making sure each was screwed in firmly. The reticle will become loose and even fall out if you take all the grub screws out in one go. If you unscrew the eyepiece you can see how the reticle is held by these three screws. WARNING - if you do this make sure that you do not get any of the copious grease from the eyepiece thread onto the reticle! I found one long thumb screw and two short - this was actually advantageous in that it made it easier to identify which screw is which during the delicate adjustment process. On my polarscope I found that the reticle was rotated clockwise by about 45 degrees from having the 6 o clock position at the bottom. I had to unscrew all of the thumbscrews and used a Q-tip to rotate the reticle anticlockwise by 45 degrees to get the 6 into position at the bottom. When spare plastic thumbscrews arrived via EBay I replaced all three and show the way they hold the reticle in place and allow adjustment below.
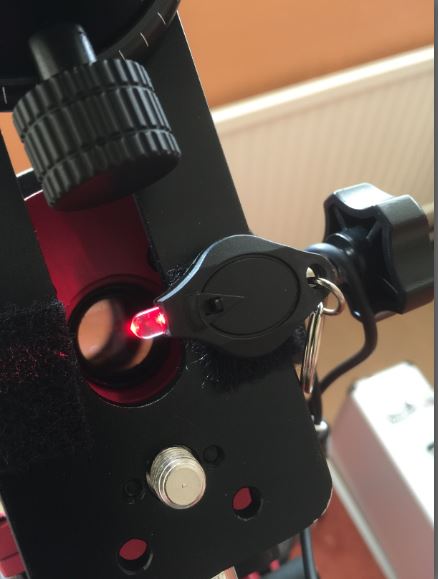
[ADDENDUM - I found a better solution to polar scope illumination - £1 from E Bay including the battery! A bit of Velcro secured it and I attached the keyring part to the dovetail bolt. You can't vary the intensity but it will do the job.]
I then went through the daytime alignment process to align the reticle with the polar axis of the mount. I used the astronomy shed process that you can find on a video there using the length of the TV aerial to match up with the lines on the reticle. Note that if you replace the Allen bolts with thumbscrews you will not be able to fit the protective cover. I suspect I would have lost this cover outside in the dark anyway!
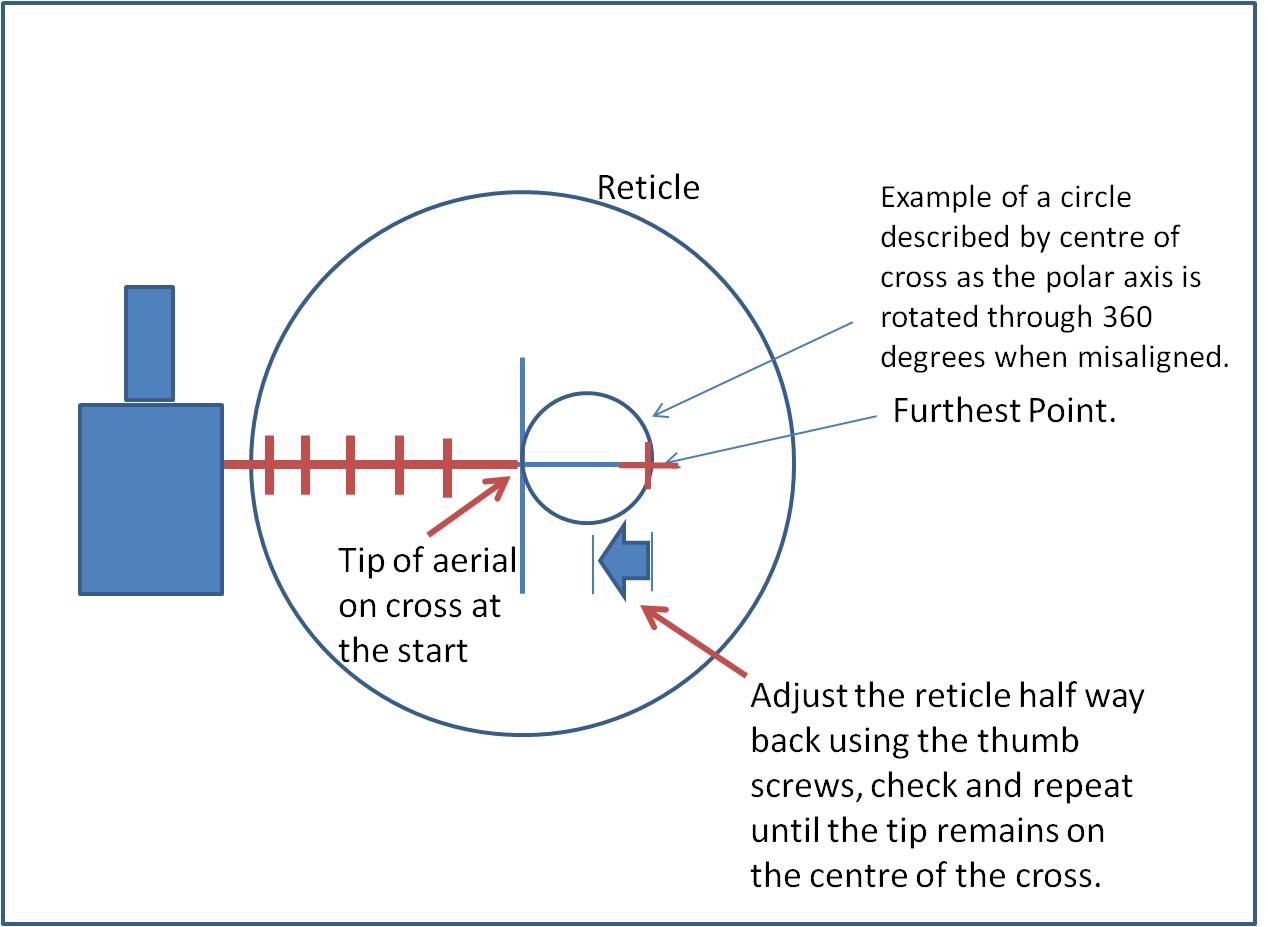
I also used the AS technique to test alignment by positioning the end of the TV aerial on the outer reticle circle and rotating the polar axis so that the tip of the aerial draws out the circle as you go through 360 degrees.
 [Your Name Here]